
Pavers can turn any outdoor spot into a welcoming space, but keeping them looking good takes a bit of know-how. If you've ever wondered how to keep your patio or driveway in top shape without spending all weekend on it, you're in the right place. With just some simple cleaning, sealing, and timely fixes, you can extend the life of your pavers and keep them safe to walk on. Let’s dive into easy steps that help protect your investment while making your outdoor area look great year-round.
To maintain your pavers effectively, regularly clean them each spring using a coarse-bristle broom and a suitable paver cleaner, promptly address oil spills with granular absorbents, and reseal the surface every three to five years after allowing at least 30 days post-installation. Additionally, keep joints filled with polymeric or jointing sand to prevent weed growth and shifting, apply weed preventatives as needed, and use power washing cautiously to avoid surface erosion—these steps will preserve both the beauty and structural integrity of your pavers for years.
When spring arrives, it ushers in the perfect opportunity to give your outdoor space a fresh start. After a long winter, your pavers may be coated with dirt, leaves, and sometimes moss or algae—especially if the weather was damp. Grabbing a stiff-bristled broom and sweeping thoroughly can significantly improve both appearance and safety. A slick surface covered in grime isn’t just unattractive—it can become slippery when wet, posing hazards to bare feet or pets. Taking this initial step to clear debris lays the foundation for more detailed cleaning efforts that follow.
Once you’ve cleared loose dirt, applying an appropriate paver cleaner is beneficial to remove stubborn stains or organic buildup. This step should always be done carefully: testing any cleaning product on a small, inconspicuous area first ensures no discoloration or damage. After applying the cleaner, rinsing thoroughly prevents residues from lingering, which could attract more dirt or even weaken the paver’s surface over time. These spring cleaning rituals are not merely cosmetic; they safeguard against early signs of wear and prolong your investment’s life.
As warmth intensifies and air dries quicker during summer, conditions become ideal for sealing pavers.
Summer is arguably the best season for sealing your pavers—a protective layer that shields them against weathering and UV damage. The heat accelerates drying times, allowing sealers to cure optimally without trapping moisture underneath, which can cause bubbling or peeling later on. Industry guidelines recommend resealing every three to five years, preventing your pavers from fading or surface erosion caused by constant foot traffic and sun exposure.
However, because improper application can lead to issues like film formation or uneven gloss, enlisting a professional service such as Chandler Power Wash brings peace of mind and expert results.
Proper timing also matters: waiting at least 30 days after installation before sealing lets natural efflorescence—the white powdery deposits often seen on new stone—dissipate naturally. Overzealous resealing too frequently, especially more than twice within a three-year span, risks creating unsightly discoloration when sunlight interacts with excess layers. Patience combined with professional advice helps maintain your pavers’ vibrant appearance.
When summer fades into cooler days, attention shifts toward identifying and repairing damages accumulated over months of use.
Fall invites homeowners to conduct thorough inspections on their outdoor paving surfaces. Loose stones signal joint sand erosion beneath, allowing shifting that disrupts walkways or patios. Filling these gaps with polymeric sand stabilizes the joints and blocks weed seeds from settling in—essential because unchecked weeds pry apart tightly fitted stones over time.
Polymeric sand hardens when moistened, forming a durable barrier to withstand freezing temperatures and prevent water infiltration that causes cracks.
Catching these minor faults before winter arrives avoids the expansion of damage caused by freeze-thaw cycles—cycles notorious for increasing surface cracking up to 30% more in cold climates compared to temperate zones. Tackling small repairs now saves potentially hundreds or thousands in major replacements later on.
Finally, winter’s cold weather demands its own specialized care routine tailored towards protection rather than restoration.
Freeze-thaw cycles pose significant challenges for paver longevity as trapped moisture expands with freezing temperatures causing tiny fissures that grow into larger breaks over time. While it might be tempting to reach for de-icing salts to keep outdoor spaces safe during icy spells, these chemicals can accelerate surface wear and degrade certain paver styles if used excessively.
Instead, alternatives such as clean sand or non-clumping cat litter provide effective traction without risking stone deterioration.
It’s important to apply these substances sparingly because even abrasive materials left on pavers long-term can erode surfaces. Regular removal of snow and ice using plastic shovels also minimizes mechanical stress while preserving the finish underneath.
“The secret to beautiful, lasting pavers is seasonally tailored maintenance paired with professional guidance,” explains Chandler Power Wash’s expert team.
| Season | Key Focus | Recommended Actions |
|---|---|---|
| Spring | Debris removal & light cleaning | Sweep regularly; test cleaners; rinse thoroughly |
| Summer | Sealing & UV protection | Seal every 3-5 years; professional application |
| Fall | Repairs & joint stabilization | Inspect; fill joints with polymeric sand |
| Winter | Ice management & gentle care | Use sand/litter instead of salt; shovel carefully |
Following this cyclical approach tailored by season elevates the durability and aesthetics of your outdoor paved areas well beyond standard expectations.
For those looking to optimize their maintenance routines or seeking expert help with cleaning or sealing services in Chandler, visiting Chandler Power Wash connects you with professionals committed to preserving your outdoor sanctuary year after year.
With seasonal maintenance understood as an ongoing choreography between cleaning, sealing, and repair, the next essential movement focuses on mastering effective methods for revitalizing your pavers' surfaces safely and efficiently.
Keeping pavers clean isn’t just about appearances; it’s about preservation. Using the right tools is essential from the start. A coarse-bristle broom is your first ally—its sturdy bristles help sweep away dirt lodged between paver joints without causing surface damage. Coupled with a paver-specific cleaner designed to lift grime without harming the stone, this combo can handle most everyday messes.
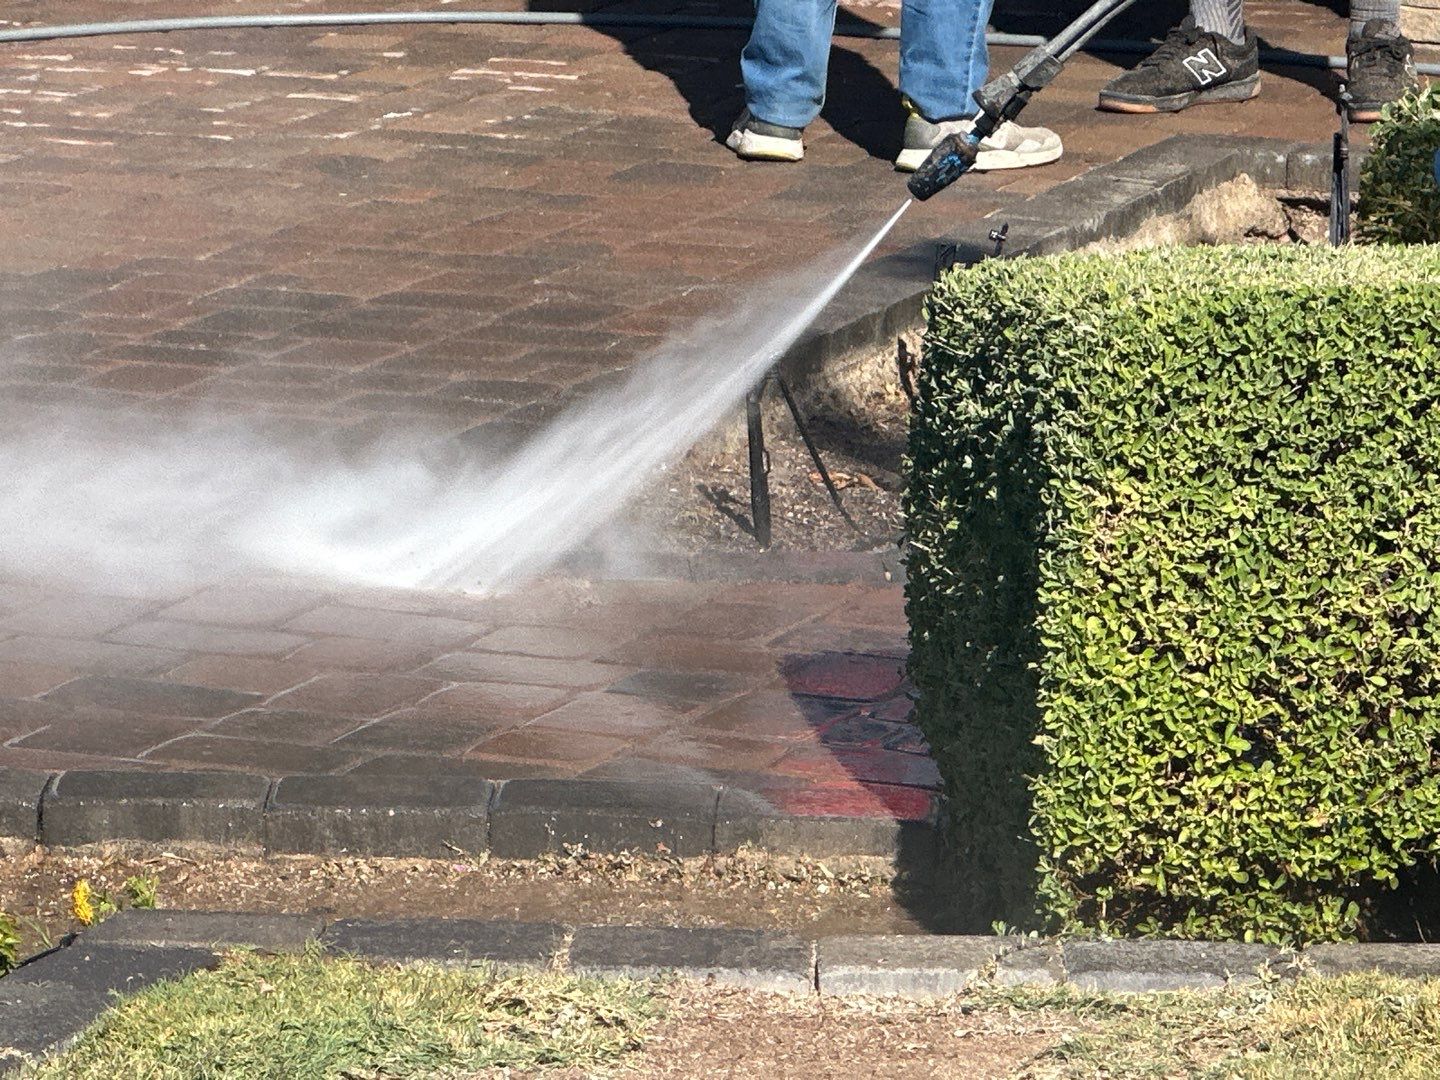
While power washers can dramatically speed up cleaning, caution is key: too close or too high-pressure a spray risks eroding the delicate aggregate surface that gives the paver its character. Maintaining at least 18 inches of distance and using moderate pressure usually keeps you safe from damage.
Tackling stubborn stains often requires a bit more finesse and patience. Consider common offenders like oil drips, mildew patches, or rust marks—they each need specialized care.
For oil stains, an absorbent granular product that soaks up the spill without rubbing it deeper is invaluable; once saturated, gently scrub to loosen any residue. Mildew or algae thrives in shaded, moist spots and demands a diluted bleach solution to break down organic growth effectively—but always rinse thoroughly afterward to avoid residue buildup. Rust stains respond surprisingly well to a natural mixture of lemon juice and salt, which works by dissolving iron deposits rather than abrasive scouring.
| Stain Type | Cleaning Solution |
|---|---|
| Oil Stains | Granular oil absorbent + gentle scrub |
| Mildew/Algae | Bleach & water solution (1:10 ratio) |
| Rust | Lemon juice + salt |
Before committing any cleaning solution over a broad area, it pays dividends to test on a small, inconspicuous patch of your pavement. This precaution ensures no unwanted discoloration or surface alteration occurs—a simple step that saves frustration later.
Another important note: warm water enhances cleaning effectiveness since it helps dissolve oils and residues faster without risking harm to your pavers. Ideally, aim for water temperatures between 40-50°C when mixing your solutions or rinsing surfaces.
Finally, after cleaning, allow your pavers to dry fully—this drying phase of at least 24-48 hours depending on humidity and temperature—is essential before applying any sealers or additional treatments. Residual moisture trapped beneath a sealing layer could cause discoloration or degrade adhesion over time, undermining all your hard work cleaning.
“Regular cleaning not only restores natural colors but also guards against premature wear — preserving your investment for years to come.”
Mastering these cleaning techniques and honoring the unique needs of your pavers creates a solid foundation for further protection efforts.
Understanding how to restore and maintain cleanliness naturally leads into exploring protective measures that extend this care even further. With surfaces prepped and ready, focus shifts to guarding your investment against future damage through expert sealing applications.
Sealing brick pavers isn't just a cosmetic upgrade—it’s a vital protective measure that creates a barrier against stains, fading from UV exposure, and damage caused by weather fluctuations. The porous nature of brick pavers means they readily absorb moisture and dirt if left unsealed, leading over time to erosion of the surface or unsightly discoloration. Sealing fills those tiny pores, preventing water infiltration which can freeze and crack the material in colder months, as well as locking out oils and other contaminants that cause stains.
To start, make absolutely certain your pavers are clean and bone dry before applying any sealant. Moisture trapped beneath the sealer leads to one of the most common failures: white hazing or peeling. This happens because water vapor pushes up through the sealed layer but has nowhere to escape. It’s akin to trying to paint over wet wood—no matter how good your paint is, it won’t stick properly. That’s why at Chandler Power Wash, we emphasize meticulous preparation, including multiple drying cycles after cleaning to ensure no residual dampness remains.
Selecting the right type of sealer is equally important as proper surface preparation. Brick pavers typically respond best to penetrating sealers, which soak into the stone without leaving a glossy film on top—this helps maintain their natural appearance while offering long-term protection for 5 to 10 years or more. Alternatives include solvent-based acrylic sealers that provide that sought-after “wet look” sheen while stabilizing joint sand to keep weeds and ants at bay. However, these need reapplication every two to four years depending on wear and weather conditions. For eco-conscious homeowners or those living in areas with strict VOC regulations, water-based acrylic sealers offer a low-odor alternative with easier cleanup but tend to be less durable and less glossy.
We customize our sealing services at Chandler Power Wash based on your specific paver type, condition, and desired outcome. Knowing which product aligns perfectly with your needs is critical. For example, choosing a solvent-based acrylic on damp or improperly dried pavers almost guarantees failure and dissatisfaction down the line.
During application, technique matters almost as much as the quality of the sealer itself. Using a pump sprayer or roller ensures even coverage across all surfaces without puddling or causing runs that dry unevenly. It’s very tempting to “overdo” it in an effort to fully cover every inch quickly; however, this backfires by increasing risk of discoloration or streaks because too thick a layer doesn’t dry properly under direct sun or heat. Patience is key—applying thin coats allows each layer to bond securely before adding more if needed.
A final word on timing after sealing: always allow at least 24 to 48 hours for the sealer to cure completely before walking or driving on the surface. This waiting period lets the protective film harden sufficiently so you’re not inadvertently scuffing or peeling off your investment within minutes of completion.
Sealing isn’t simply an afterthought but a cornerstone of long-lasting outdoor pavers—it blends science with craftsmanship requiring precision preparation, thoughtful product selection, and deliberate application technique. Properly executed sealing preserves your patio or driveway’s structural integrity and beauty for years ahead while minimizing costly repairs.
If you want expert assistance tailored specifically for your paver installation's unique needs and challenges, consider connecting with Chandler Power Wash’s professional sealing services—a blend of experience honed since the early 1990s Detroit projects combined with local know-how ensures superior results every time.
Mastering sealing prepares the foundation for addressing deeper issues found in outdoor surfaces. Next, we'll examine practical approaches essential for restoring stability and appearance when cracks appear or individual stones loosen over time.
Catching small issues like loose or cracked pavers early can save you from more extensive—and expensive—repairs down the road. When a paver becomes loose, it's often because the sand or base material underneath has eroded or shifted. The fix begins by carefully removing the loose paver to avoid damaging surrounding ones.
Once out, cleaning the area beneath is vital because any remaining debris or loose sand will prevent the paver from settling properly again. After clearing it, add a fresh layer of sand—polymeric sand is ideal since it hardens and helps lock everything in place. When placing the paver back, use a rubber mallet to tap it gently but firmly, making sure it sits level with adjacent stones.
This process might sound simple, but the key lies in doing each step meticulously. If you skip cleaning under the paver or fail to compact the sand properly, that stone might become loose again quickly. Over time, repeated neglect can cause shifting that damages your entire paved surface’s pattern and stability—turning what was once a charming patio into a tripping hazard.
Maintaining this routine as soon as you notice looseness is a straightforward way to keep your space safe and attractive.
Alongside loose pavers, cracks are another common issue that can compromise an otherwise pristine walkway or patio.
Small cracks develop from natural movement in your home's foundation or seasonal weather changes causing expansion and contraction. For these minor fissures, filling them with polymeric sand works well because it not only fills gaps but also bonds when moistened, preventing weed growth and further deterioration.
However, if you see larger or irregular cracks—especially those affecting multiple stones—it often means replacement is necessary. This ensures structural integrity without risking further damage spreading across your paving.
A homeowner in Chandler once noticed small cracks growing around their backyard firepit pavers. Instead of ignoring them, they acted quickly by filling smaller gaps with polymeric sand and swapping out damaged stones immediately. Months later, this prevented what could have been costly repaving of the entire area after heavy seasonal rains caused ground shifts.
Their attentiveness preserved both the beauty and usability of their patio—proving that timely repairs truly pay off.
Regular inspections paired with these repair steps will protect your investment and extend the life of your outdoor spaces. Maintaining stable paving isn’t just about appearances; it’s about safety and functionality too.
If you’re unsure about tackling repairs yourself or want professional assurance that everything’s done correctly, consider reaching out to local experts like us at Chandler Power Wash. We specialize in restoring, sealing, and repairing pavers so your outdoor space remains inviting season after season.
Addressing these common repair needs sets the stage for tackling persistent challenges like weeds and shifting stones—issues that can disrupt even well-maintained surfaces and demand different preventative approaches.
Weeds sprouting between your pavers are not just an annoyance—they threaten the very stability of your outdoor space. Left unchecked, these persistent invaders send roots deep into the joints, prying stones apart and undermining the solid foundation beneath. That’s why weed prevention must be more than a quick fix; it requires an ongoing strategy grounded in proper materials and routine care.
One of the most effective ways to discourage weeds from taking hold is by applying a granular weed preventer yearly. This simple step creates a hostile environment for weed seeds attempting to germinate in those tight joint spaces. But to truly lock out weeds, polymeric sand between the joints is invaluable. Unlike traditional sand, polymeric sand hardens when moistened, forming a semi-solid barrier tough enough to resist weed infiltration yet flexible enough to accommodate slight movements caused by weather or foot traffic. Using polymeric sand can reduce joint erosion by up to 75%, making it a smart choice for long-term maintenance.
While materials do most of the heavy lifting, how you install and maintain your paver base and edges drastically influence shifting risks. A well-compacted base — ideally packed to at least 95% Proctor density — acts like bedrock beneath your pavers, limiting settling or movement during freeze-thaw cycles common in many climates. And strong edge restraints act like a fence holding everything in place, reducing lateral shifting by about 80%. However, even with perfect installation, nature and use will inevitably cause slight shifts over time.
This is where ongoing maintenance plays a starring role. Think of your pavers as if they were a well-oiled machine that needs periodic tuning: regularly topping off joints with replacement sand is akin to tightening nuts and bolts that loosen with use. Keeping the joints filled prevents sand loss, which otherwise leads to instability and opens the door for weed growth and water infiltration — both prime culprits in causing pavers to shift or settle unevenly.
“Just like lubricating the hinges on a door keeps it swinging smoothly,” topping up joint sand stops problems before they start.
It’s important to note that while power washing can be great for cleaning your pavers, using too aggressive a spray can erode joint sand or surface aggregate, inviting weeds back sooner and accelerating wear. Moderation and gentle techniques preserve both joints and stone faces alike.
For homeowners seeking extra peace of mind against weeds, installing polypropylene weed barrier fabrics beneath the base layer during installation has been shown to reduce weed growth by up to 90%. Combined with good joint care and sealing every few years, this multi-layered approach maximizes longevity and appearance.
| Prevention Technique | Benefit | Impact on Paver Longevity |
|---|---|---|
| Granular Weed Preventer (annual) | Stops seed germination | Keeps joints clear |
| Polymeric Sand | Hardens joints, prevents weed entry | Reduces erosion & paver movement by 75% |
| Proper Base Compaction (≥95% Proctor) | Stabilizes foundation | Cuts settling & shifting by 70% |
| Edge Restraints | Holds pavers laterally | Reduces shifting by 80% |
| Regular Joint Sand Replenishing | Maintains tight fit | Prevents instability |
| Polypropylene Weed Barrier Fabric | Blocks weed roots | Cuts weeds by 90%, protects structure |
Preventing weed growth and shifting isn’t about one magic bullet — it’s about combining thoughtful installation practices with consistent upkeep. Treating your paver system like any valuable investment—with attentive care—assures it stays beautiful, safe, and reliable long beyond its warranty period.
Having established strong defenses against weeds and shifting, attention naturally shifts toward methods that maintain your pavers’ pristine condition through cleaning and sealing to protect them over time.
Choosing the right paver material is not just about looks; it’s about future-proofing your investment. High-density pavers such as concrete, brick, and natural stone provide exceptional resistance to daily wear and weather extremes. Think of these options as the sturdy backbone supporting your outdoor area; while they might cost more upfront, their strength and durability mean fewer repairs and replacements over time, ultimately saving you money and hassle.
Consider the difference: poured concrete slabs tend to crack completely when stressed by shifting ground or heavy loads. In contrast, individual pavers are laid over a compacted base that allows slight movement without catastrophic failure. According to the Interlocking Concrete Pavement Institute (ICPI), concrete pavers can be approximately three times stronger than standard poured concrete. This inherent flexibility not only guards against cracking but also makes repairs simpler—if one paver is damaged, it can be replaced alone rather than tearing up the entire slab.
Beyond the choice of material, the climate you live in plays a significant role in determining what kind of paver will serve you best.
For those in freeze-thaw regions, durability isn’t optional—it’s essential. Pavers must endure repeated cycles of freezing and thawing without crumbling or spalling. Concrete pavers with high compressive strength and low water absorption rates perform better under these conditions. Brick pavers offer good color stability but may be thinner, making them more vulnerable if not installed with proper base support.
Our team at Chandler Power Wash emphasizes selecting products designed for your local environment. Nicolock’s patented Paver-Shield™ technology, for example, embeds pigment throughout the cement rather than merely coating the surface. This ensures colors remain vivid for years despite intense UV exposure and heavy foot traffic—a benefit especially valuable in sunny Arizona climates where fading is a common concern.
Natural stone options also have their place depending on your landscape vision and functional needs. Flagstones with Cool Touch Technology™ reflect heat away so poolside areas stay comfortable even under direct sun—a feature worth considering if you're often barefoot outdoors. However, natural stone typically demands sealing every two to three years to maintain resilience against moisture damage and stains.
Material strength alone doesn’t guarantee longevity; how those materials are shaped and arranged matters just as much.
The shape and thickness of your pavers determine not only aesthetic appeal but also load distribution capabilities. Rectangular pavers lend themselves well to interlocking patterns that evenly distribute weight and reduce shifting. Cobblestone styles offer old-world charm but require meticulous base preparation due to uneven surfaces that can lead to settling issues if neglected.
Even premium materials fail prematurely if installed on poorly compacted bases. A stable foundation prevents sinking and related drainage challenges—two frequent causes behind costly repairs down the line. Prioritizing professional installation ensures each unit sits securely, locking together to form a durable surface built to withstand years of foot traffic, weather extremes, and occasional vehicle loads.
At Chandler Power Wash, we know firsthand how critical these details are for long-term satisfaction with your outdoor space.
“Investing in quality materials combined with expert installation is the surest way to enjoy a beautiful patio or driveway that stands firm season after season.”
Ultimately, selecting durable materials tailored to your climate and usage needs forms an unshakeable foundation for outdoor spaces designed to last. It’s an upfront choice that pays dividends continuously—saving money, reducing maintenance headaches, and preserving beauty through all kinds of weather.
When you’re ready to enhance your hardscape with lasting materials perfectly suited for your area, reach out to Chandler Power Wash for expert guidance and professional paver sealing services that keep your investment looking pristine year-round.
Thoughtful selection paired with expert installation sets the stage for outdoor spaces that remain stunning and sturdy through every season. Your investment deserves nothing less than durability paired with care.

1900 W Carla Vista Dr
Chandler, AZ 85246
info@chandlerpowerwash.com
Mon - Sat 7 AM - 7 PM
Closed Sunday
Chandler Arizona Service Areas:
Ocotillo • Fulton Ranch • Downtown Chandler • Sun Groves • Carino Estates •
Clemente Ranch • Arden Park • Circle G • Sunbird Golf Resort • San Marcos Estates • Ironwood Vistas • San Tan Heights • Sun Lakes • The Islands • Chandler Heights
Chandler Power Wash and Paver Sealing | Powered by Pressure Power Pros | Copyright © 2026